2022年12月4日 星期日

在 Linux 上安裝 VPN -- 以 NordVPN 為例

方法一

  • 安裝 NordVPN 應用程式

    1. $ sh <(curl -sSf https://downloads.nordcdn.com/apps/linux/install.sh)
    2. 沒有 curl 可以安裝 $ sudo apt install curl
  • NordVPN 指令集

    1. nordvpn login - Log in.

    2. nordvpn connect or nordvpn c - Connect to VPN. To connect to specific servers, use nordvpn connect <country_code server_number> (eg. nordvpn connect uk715) 

    3. nordvpn disconnect or nordvpn d - Disconnect from VPN. 

    4. nordvpn connect US -g double_vpn - Connect to a Double VPN server where the first hop is a specific country 

    5. nordvpn connect P2P - connect to a P2P server. 

    6. nordvpn connect The_Americas - connect to servers located in the Americas. 

    7. nordvpn connect Dedicated_IP - connect to a Dedicated IP server. 

    8. nordvpn set or nordvpn s - Set a configuration option. Possible options:

      • nordvpn set cybersec on or off - Enable or disable CyberSec 

      • nordvpn set killswitch on or off - Enable or disable Kill Switch 

      • nordvpn set autoconnect on or off - Enable or disable auto-connect. You can set a specific server for automatic connection using nordvpn set autoconnect on country_code+server_number. Example: nordvpn set autoconnect on us2435.

      • nordvpn set notify on or off - Enable or disable notifications

      •  nordvpn set dns 1.1.1.1 1.0.0.1 - Set custom DNS (you can set up a single DNS or two like shown in this command). 

      • nordvpn set protocol udp or tcp - Switch between UDP and TCP protocols 

      • nordvpn set obfuscate on or off - Enable or disable Obfuscated Servers. 

      • nordvpn set technology - Set connection technology (OpenVPN or NordLynx)

    9. nordvpn whitelist add port 22 - Add a rule to whitelist a specified incoming port. You can also whitelist multiple ports — just separate their numbers with a space. 

    10. nordvpn whitelist remove port 22 - Remove the rule to whitelist a specified port. 

    11. nordvpn whitelist add subnet 192.168.0.0/16 - Add a rule to whitelist a specified subnet. 

    12. nordvpn whitelist remove subnet 192.168.0.0/16  - Remove the rule to whitelist a specified subnet. 

    13. nordvpn account - See account information 

    14. nordvpn register - Register a new user account 

    15. nordvpn rate - Rate your last connection quality (1-5) 

    16. nordvpn settings - See the current settings. 

    17. nordvpn status - See the connection status. 

    18. nordvpn countries - See the country list. 

    19. nordvpn cities - See the city list. 

    20. nordvpn groups - See a list of available server groups. 

    21. nordvpn logout - Log out. 

    22. nordvpn help or nordvpn h - See the list of available commands or help for a specific command.

      You can get an extensive explanation of all commands by using the man nordvpn command in Terminal.

方法二

  • 關閉 IPv6 

    1. sudo nano /etc/sysctl.conf
    2. 在檔案尾端加入下列 4 行:
      net.ipv6.conf.all.disable_ipv6 = 1

      net.ipv6.conf.default.disable_ipv6 = 1

      net.ipv6.conf.lo.disable_ipv6 = 1

      net.ipv6.conf.tun0.disable_ipv6 = 1
    3. 存檔,重啟。 
  •  從 Linux Network Manager 連上 NordVPN Servers

    1. 下載 OpenVPN Configuration File Package (ovpn.zip),並解壓縮

    2.  從螢幕右上角點開網路設定,下拉 VPN OFF 選擇 VPN Setting

    3. 按下 VPN 旁 + 號,新增 VPN

    4.  選擇連線類型 Import from file…

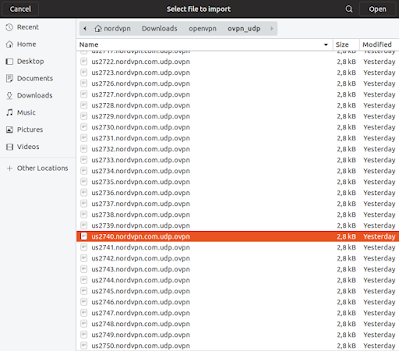
    5.  從步驟 1 解壓縮產生之 ovpn_udp 夾中,開啟一個組態檔或參考方法三,使用推薦伺服器的組態檔。

    6. 在跳出的視窗中輸入帳密,按下 ADD 新增


    7.  在 Linux Network Manager 畫面 VPN 項下,按下撥動開關,當它呈現綠色,就完成 VPN 連線工作


方法三

  •  從 NordVPN 網站「推薦伺服器」功能連上 NordVPN Servers

    1.  點選「推薦伺服器

    2.  點選「Show available protocols」

    3.  點選「OpenVPN UDP」右側「Download config」

    4.  承接方法二:步驟 6 加入 VPN 即可

2022年10月1日 星期六

重新安裝 grub 的程序步驟

  1.  以任一款 Linux OS (與你要修復的 Linux OS 同款最好) 的 Live USB 開機。

  2.  查看硬碟分區狀態:
    $sudo fdisk -l

    Disk /dev/sda: 232.89 GiB, 250059350016 bytes, 488397168 sectors
    Disk model: WDC WD2500AAJS-0
    Units: sectors of 1 * 512 = 512 bytes
    Sector size (logical/physical): 512 bytes / 512 bytes
    I/O size (minimum/optimal): 512 bytes / 512 bytes
    Disklabel type: dos
    Disk identifier: 0xd273611e

    Device     Boot  Start           End     Sectors     Size  Id        Type
    /dev/sda1  *       2048     206847     204800  100M   ef    EFI (FAT-12/16/32)
    /dev/sda2       206848 61646847 61440000 29.3G   83   Linux

  3. 全程使用超級使用者身分

    home@mint: ~$ sudo -s (或 sudo -i )
    root@mint: /home@mint# cd (注意粗體部份的變化)

  4. 掛載磁區
    root@mint: /home@mint# mkdir /mnt/boot
    root@mint: /home@mint# mkdir /mnt/boot/efi
    root@mint: /home@mint# mount /dev/sda2 /mnt
    root@mint: /home@mint# mount /dev/sda1 /mnt/boot/efi

  5. 將 /mnt 暫時虛擬為根目錄

    為防止在 chroot 时,出現下面的警告:
    chroot: failed to run command '/bin/bash': No such file or directory
    root@mint: ~# for dir in /root /opt /proc /dev /sys /etc /bin /sbin /var /usr /lib /lib64 /tmp; do  mkdir /mnt$dir && mount  -B $dir /mnt$dir; done

    為防止在 grub-install 时,出現下面的警告:
    Installing for x86_64-efi platform.
    grub-install: warning: EFI variables are not supported on this system.
    root@mint: ~# for dir in /sys/firmware/efi/efivars; do mount  -B $dir /mnt$dir; done

    root@mint: ~# chroot /mnt(
    注意粗體部份的變化)

  6. 刪除既有 grub
    root@mint: ~#  dpkg --configure -a
    root@mint: ~# apt-get install -fy
    root@mint: ~# apt-get purge --allow-remove-essential -y grub-com*
    root@mint: ~# apt-get purge --allow-remove-essential -y grub2-com*
    root@mint: ~# apt-get purge --allow-remove-essential -y shim-signed
    root@mint: ~# apt-get purge --allow-remove-essential -y grub-common:*
    root@mint: ~# apt-get purge --allow-remove-essential -y grub2-common:*

  7. 重新安裝 grub
    root@mint: ~# apt-get install -y grub-efi

  8. UEFI 啟動用(有兩個作法都可採用)
    root@mint: ~# grub-install --target=x86_64-efi --efi-directory=/boot/efi /dev/sda

    root@mint: ~# grub-install /dev/sda

    如果出現下面,就一切OK
    Installing for x86_64-efi platform.
    Installation finished. No error reported.

  9. 更新 grub 產生/boot/grub/grub.cfg

    /boot/grub/grub.cfg=/etc/grub.d/01~ + /etc/default/grub + others
    先編寫 /etc/grub.d/40_custom,加入 menuentry
    再修改 /etc/default/grub,加入 GRUB_DISABLE_OS_PROBER=false、變動預設啟動順序及選單是 hidden (不出現) 或 menu (出現)

    root@mint: ~# update-grub


    root@mint: ~# grub-mkconfig -o /boot/grub/grub.cfg

  10. 離開
    Ctrl + D 先跳出 chroot /mnt 環境
    Ctrl + D 再跳出超级使用者環境
    reboot
參考資料:Debian Wiki

2022年8月28日 星期日

BIOS、UEFI、MBR、GPT

  • 2T 以下磁碟分割採 MBR(Master Boot Record,主要開機磁區),最多能有4個主分割
  • 2T 以上磁碟分割採 GPT,會有獨立的 EFI partiton,參考文章:歐飛先生
  • 統一可延伸韌體介面(Unified Extensible Firmware Interface,UEFI
  • 傳統 BIOS:組合語言撰寫,文字介面,用鍵盤操作,英文
  • UEFI BIOS:C 語言 撰寫,圖形介面,可用滑鼠操作,可選擇語言
  • MBR轉GPT指令:
    mbr2gpt /disk:2 /validate /allowfullos (2號磁碟,測試可轉否,允許轉換執行中的OS)
    mbr2gpt /disk:2 /convert /allowfullos (真的轉換)
  • 手動產生 Msr patition (保留,用途不明,gpt 磁碟專有):
 
      
  • 創建 EFI partition ():


  • 引導E:\windows開機的中文語系,uefi 檔案系統,寫入Z (efi partition)


如果您想要讓電腦只開機進入特定模式,您可移除 Windows PE 或 Windows 安裝程式用來以 UEFI 或 BIOS 模式開機的檔案。 視您想要開機進入的模式而定,移除下列檔案。

僅以 UEFI 模式開機

從 Windows PE 或 Windows 安裝程式媒體的根目錄中移除 bootmgr 檔案。 這可防止裝置在 BIOS 模式啟動。

僅以 BIOS 模式開機

從 Windows PE 或 Windows 安裝程式媒體的根目錄中移除 efi 資料夾。 這可防止裝置在 UEFI 模式啟動。


參考:T客邦-- 大容量硬碟、UEFI 系統進階玩法:GPT / MBR 分割表格式無損輕鬆互轉

              隨意窩日誌---GTP / MBR 小實驗(Windows PE 環境)


2022年8月20日 星期六

利用 Debian backports 為 Linux OS Slax 安裝 LibreOffice 7.4

手動的作法: 

$ wget https://www.libreoffice.org/donate/dl/deb-x86_64/7.4.0/zh-TW/LibreOffice_7.4.0_Linux_x86-64_deb.tar.gz 
$ tar zxvf LibreOffice_7.4.0_Linux_x86-64_deb.tar.gz
$ cd LibreOffice_7.4.0_Linux_x86-64_deb/DEBS/
$ dpkg -i *.deb

 backports 的作法:

$ sudo apt install -t bullseye-backports libreoffice

請參閱:Libreoffice - Debian Wiki

2022年7月22日 星期五

UEFI主板+CMS關閉+Security Boot關閉+Wintogo+linux雙系統


磁碟分割需求

當您將 Windows 部署到 UEFI 型裝置時,必須使用 GUID 磁碟分割表格 (GPT) 檔案系統,將包含 Windows 磁碟分割的硬碟格式化。 其他磁碟機可能會使用 GPT 或主開機記錄 (MBR) 檔案格式。

GPT 磁碟機最多可以有 128 個磁碟分割。

每個磁碟分割最多可以有 18 Exabyte (約 1 千 8 百 80 萬 TB) 的空間。

系統磁碟分割

裝置必須有系統磁碟分割。 在 GPT 磁碟機上,這稱為 EFI 系統磁碟分割 (ESP)。 此磁碟分割通常會放在主要硬碟上。 裝置開機至此磁碟分割。

此磁碟分割的大小下限為 100 MB,且必須使用 FAT32 檔案格式來格式化。

此磁碟分割是由作業系統管理,不應包含任何其他檔案,包括 Windows RE 工具。

注意

進階格式 4K 原生磁碟機 (每個磁區 4 KB) 的磁碟機,由於 FAT32 檔案格式的限制,所以大小下限為 260 MB。 FAT32 磁碟機的磁碟分割大小下限算法是:磁區大小 (4KB) x 65527 = 256 MB。

進階格式 512e 磁碟機不會受到這項限制的影響,因為其模擬磁區大小是 512 個位元組。 512 位元組 x 65527 = 32 MB,小於此磁碟分割的大小下限 100 MB。

Microsoft 保留的磁碟分割 (MSR)

在Windows 10中,MSR 的大小為 16 MB。

將 MSR 新增至每個 GPT 磁碟機,以協助磁碟分割的管理。 MSR 是保留的磁碟分割,不會接收磁碟分割識別碼。 且無法儲存使用者資料。

Windows 磁碟分割

  • 在 64 位元版本中,磁碟分割必須至少有 20 GB 的磁碟機空間,32 位元版本則為 16 GB。
  • Windows 磁碟分割必須以 NTFS 檔案格式加以格式化。
  • 在使用者完成全新體驗 (OOBE) 且自動維護完成之後,Windows 磁碟分割必須有 16 GB 的可用空間。

復原工具磁碟分割

此磁碟分割必須至少有 300 MB。

Windows 修復環境 (Windows RE) 工具需要額外的可用空間:

  • 至少 52 MB,但建議 250 MB,以容納未來的更新,特別是自訂的資料分割配置。

計算可用空間時,請注意:

  • 復原映像 winre.wim 通常介於 250-300 MB 之間,視您新增的驅動程式、語言、自訂而定。
  • 檔案系統本身可能會佔用更多空間。 例如,NTFS 可能會在 750 MB 的磁碟分割上保留 5-15 MB 或更多的空間。

此分割區必須使用類型識別碼: DE94BBA4-06D1-4D40-A16A-BFD50179D6AC

復原工具應位於與 Windows 磁碟分割不同的磁碟分割之中,以便支援自動容錯移轉,以及支援以「Windows BitLocker 磁碟機加密」加密的開機磁碟分割。

我們建議您將此磁碟分割緊鄰放在 Windows 磁碟分割之後。 這讓 Windows 在未來更新需要較大的復原映像時,能夠修改並重新建立磁碟分割。

資料磁碟分割

建議的 Windows 10 磁碟分割配置不包含資料磁碟分割。 不過,如果需要資料磁碟分割,應將其放在 Windows RE 磁碟分割之後。 這可讓 Windows RE 的未來更新藉由壓縮 Windows 磁碟分割來擴大 Windows RE 磁碟分割。

此配置讓使用者更難以移除資料分割,並將空間與 Windows 磁碟分割合併。 若要這麼做,Windows RE 磁碟分割必須移至從資料磁碟分割回收之未使用空間的最後,以便擴充 Windows 磁碟分割。

Windows 10 沒有協助執行此流程的功能或公用程式。 不過,如果電腦隨附資料磁碟分割,電腦製造商可以開發並提供這類公用程式。


CreatePartitions-UEFI-FFU.txt

此腳本是以CreatePartitions-UEFI.txt為基礎,但不會建立復原分割區。 如此一來,Windows分割區就是磁片磁碟機上的最後一個分割區,而且可以展開。 如果使用此腳本,稍後可以使用 ApplyRecovery.bat 來設定復原分割區。

rem == CreatePartitions-UEFI.txt ==
rem == These commands are used with DiskPart to
rem    create four partitions
rem    for a UEFI/GPT-based PC.
rem    Adjust the partition sizes to fill the drive
rem    as necessary. ==
select disk 0
clean
convert gpt
rem == 1. System partition =========================
create partition efi size=100
rem    ** NOTE: For Advanced Format 4Kn drives,
rem               change this value to size = 260 **
format quick fs=fat32 label="System"
assign letter="S"
rem == 2. Microsoft Reserved (MSR) partition =======
create partition msr size=16
rem == 3. Windows partition ========================
rem ==    a. Create the Windows partition ==========
create partition primary
rem ==    b. Create space for the recovery tools ===
rem       ** Update this size to match the size of
rem          the recovery tools (winre.wim)
rem          plus some free space.
shrink minimum=500
rem ==    c. Prepare the Windows partition =========
format quick fs=ntfs label="Windows"
assign letter="W"
rem === 4. Recovery partition ======================
create partition primary
format quick fs=ntfs label="Recovery"
assign letter="R"
set id="de94bba4-06d1-4d40-a16a-bfd50179d6ac"
gpt attributes=0x8000000000000001
list volume
exit 

 DiskPart /s F:\CreatePartitions-UEFI.txt

EFI系統分割內重要檔案路徑 

/EFI/Microsoft/Boot/bootgmfw.efi (增加一條直達Windows的UEFI entry)

/EFI/ubuntu/shimx64.efi (增加一條直達Linux的UEFI entry)


/EFI/Microsoft/Boot/BCD (開機選單選擇Windows後,由此引導開啟)